Working with Listing Results
Here's what you can do with search results.
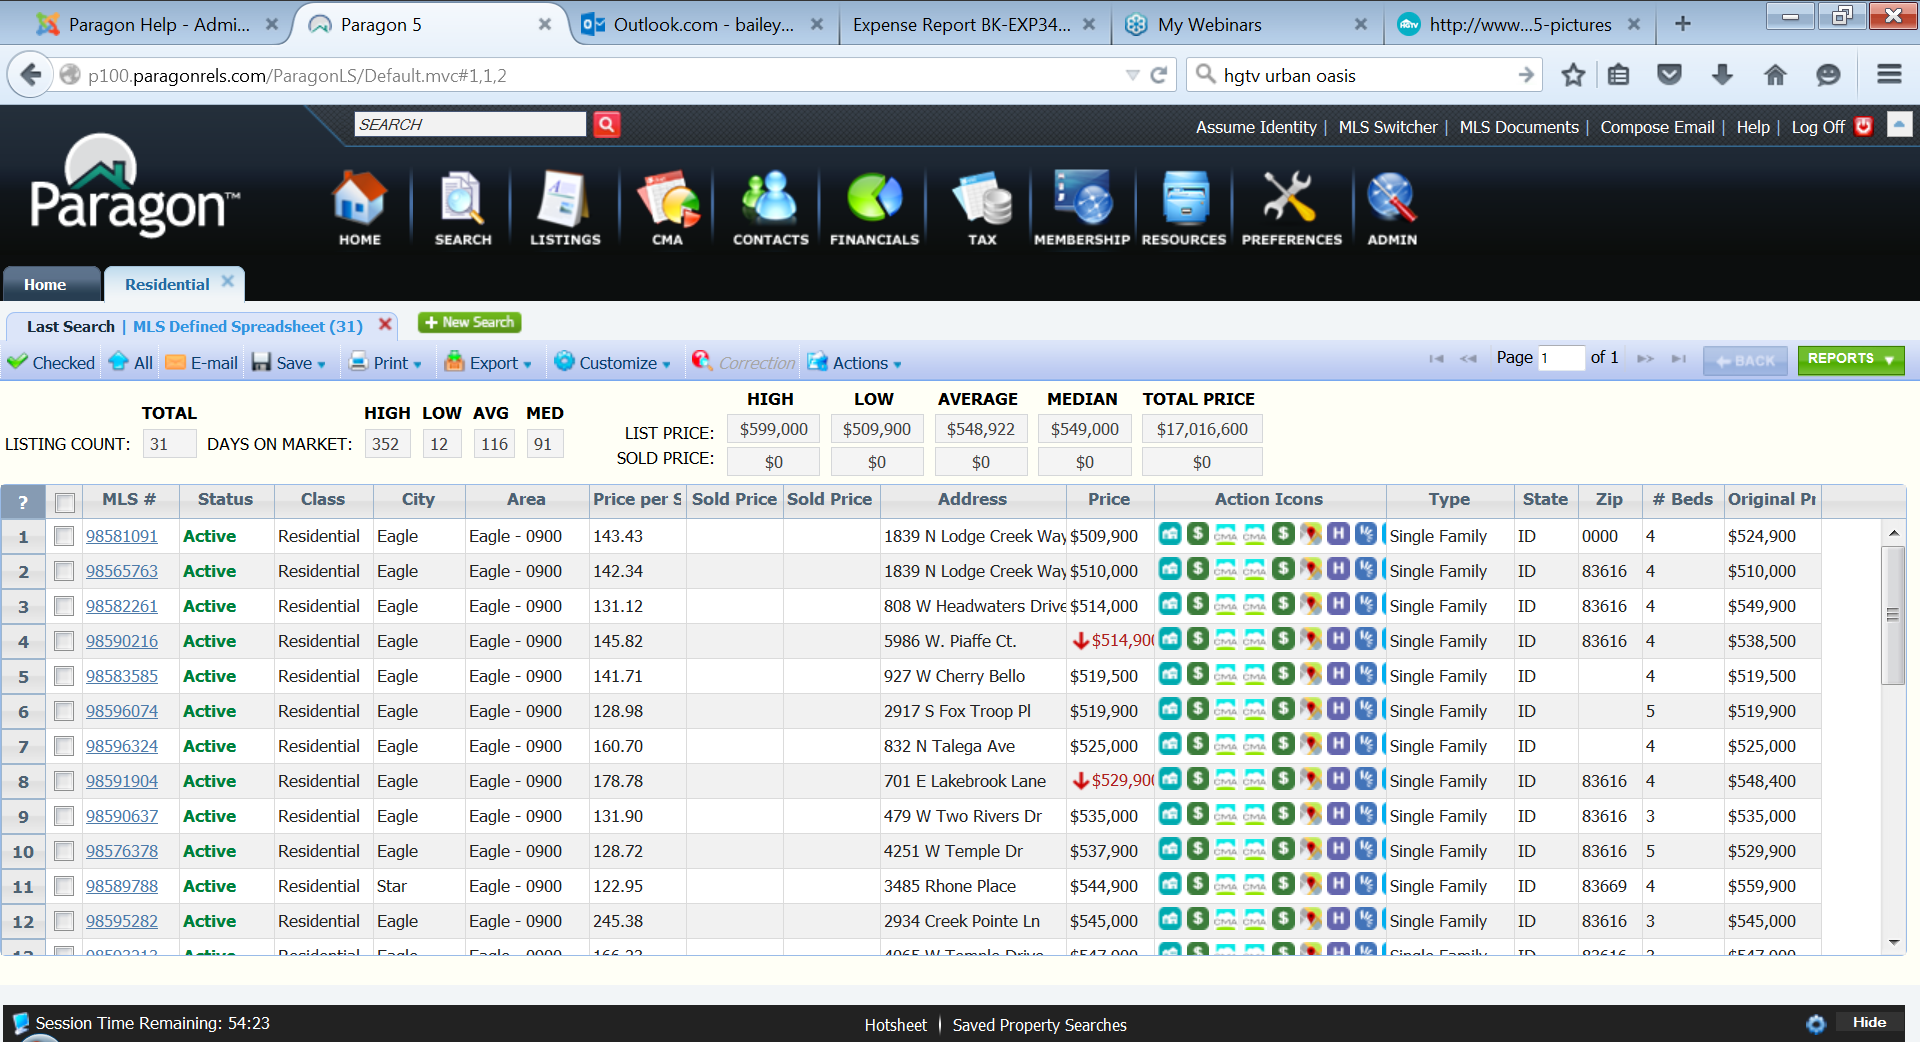
Listings display in the default grid shown below.
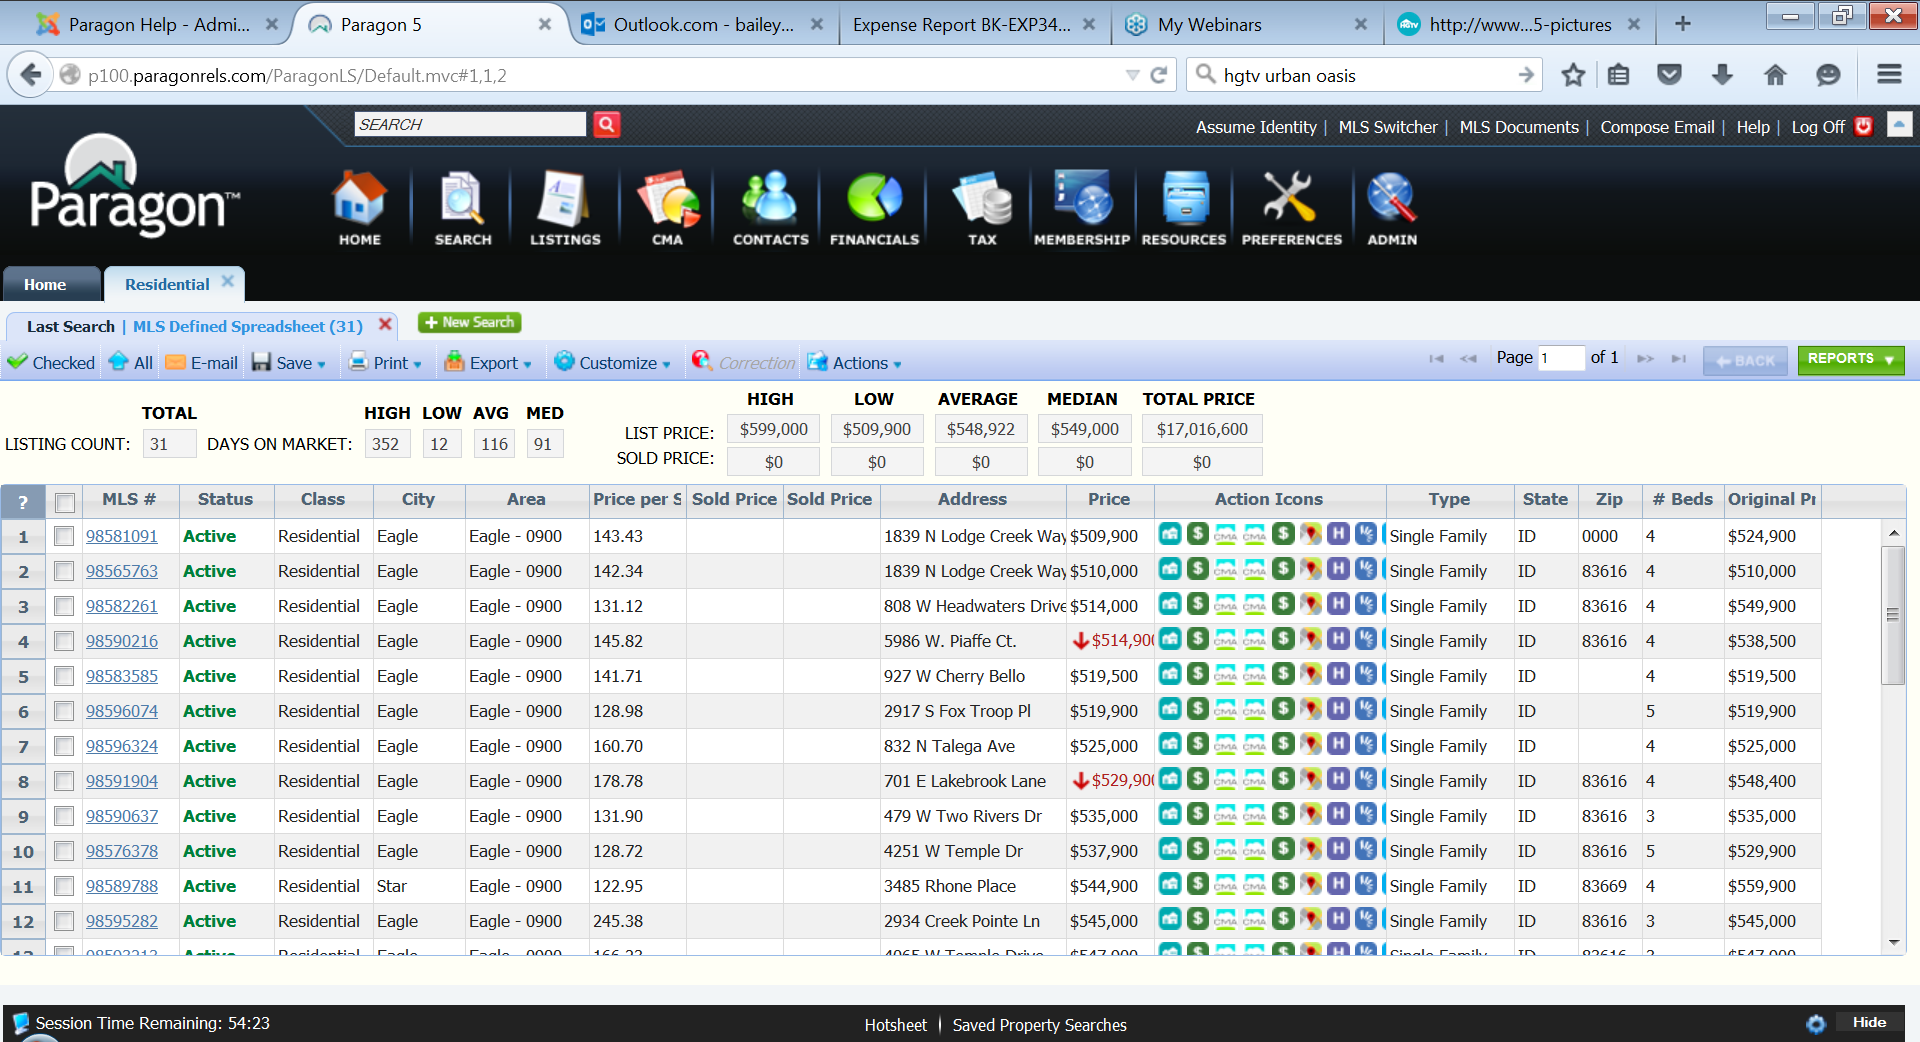
You can also view these listings in any of the other available reports by clicking on the reports button.
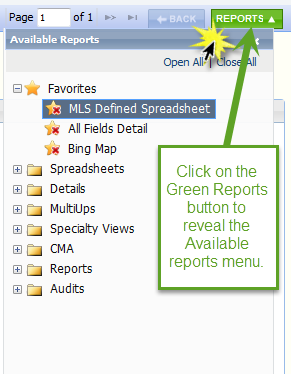
View the listings in any of these reports views, then click on the desired report.
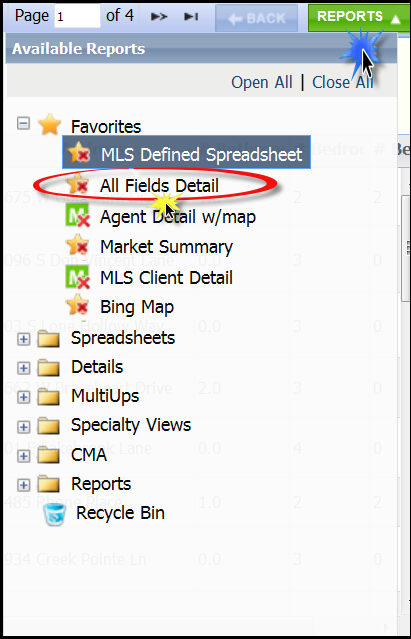
The listings will now be displayed in this alternate report view.
Click the "Back" button to return to the grid view.

Here's how to use and adjust the default search results grid.
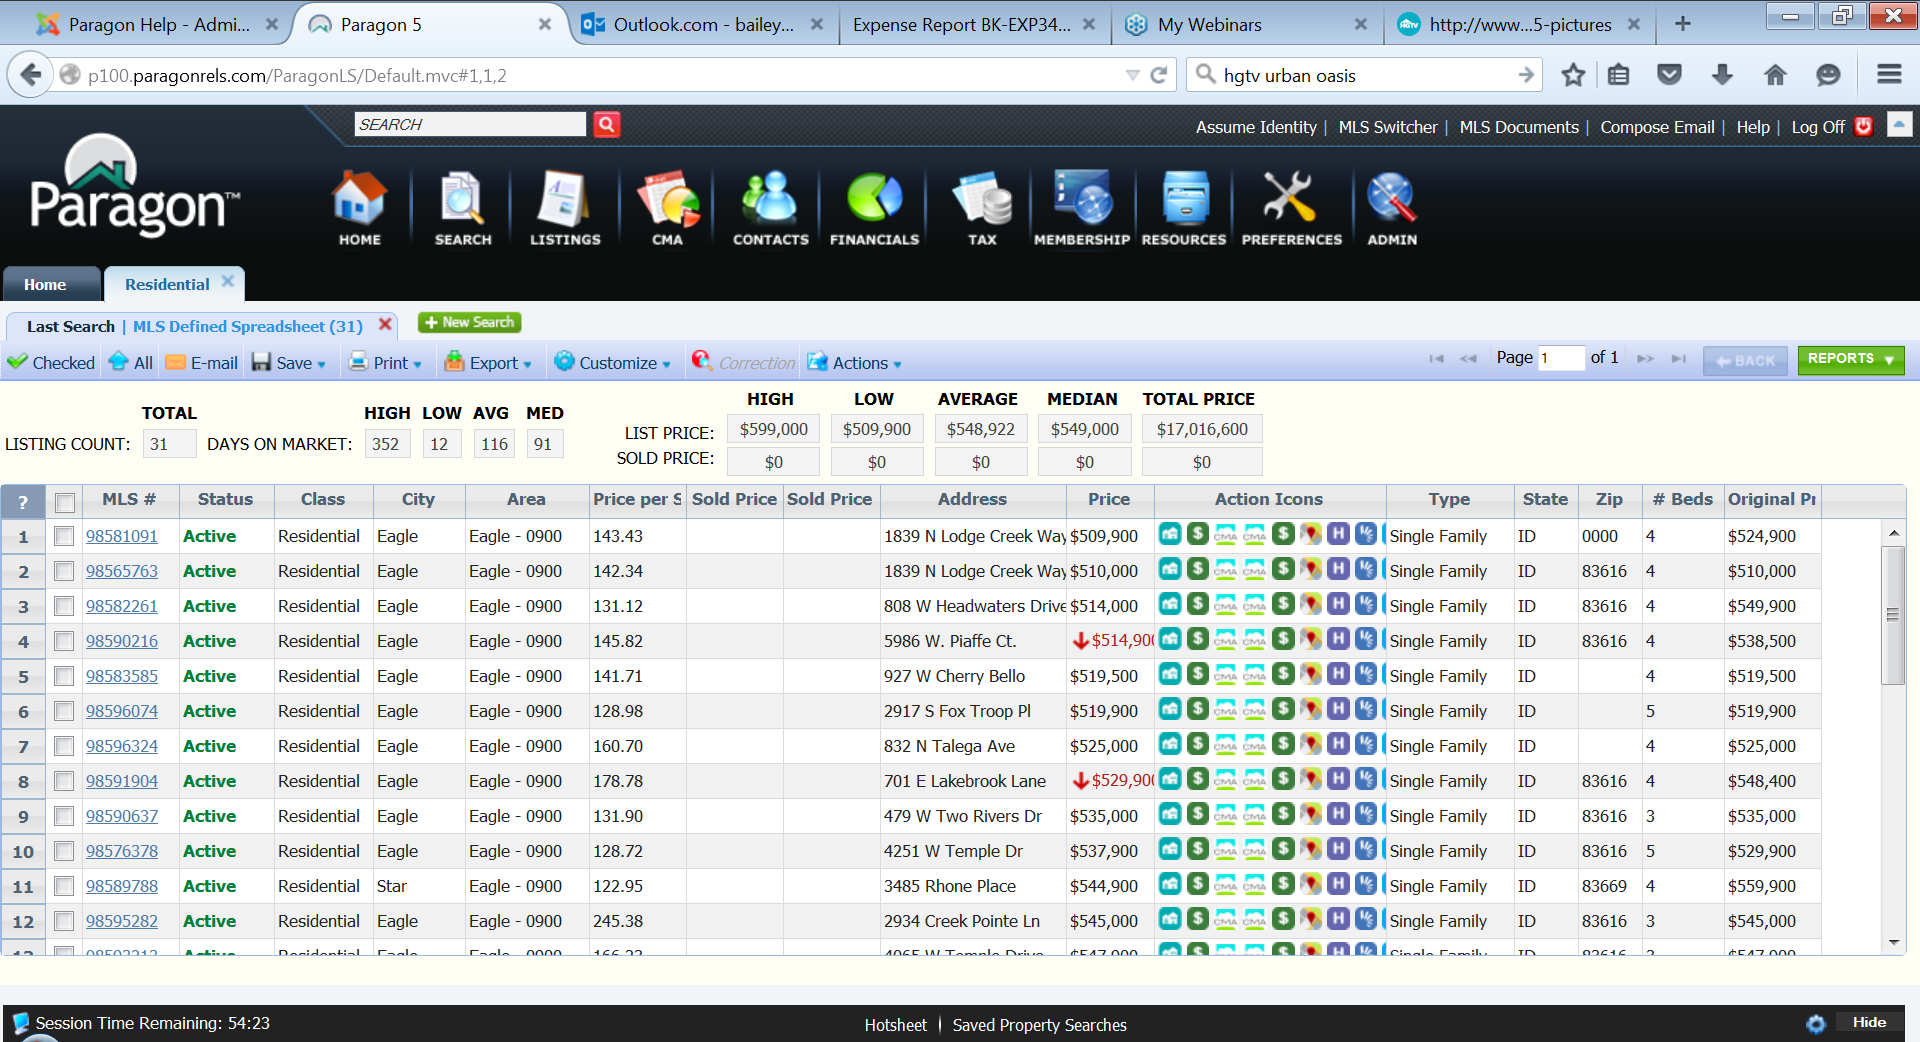
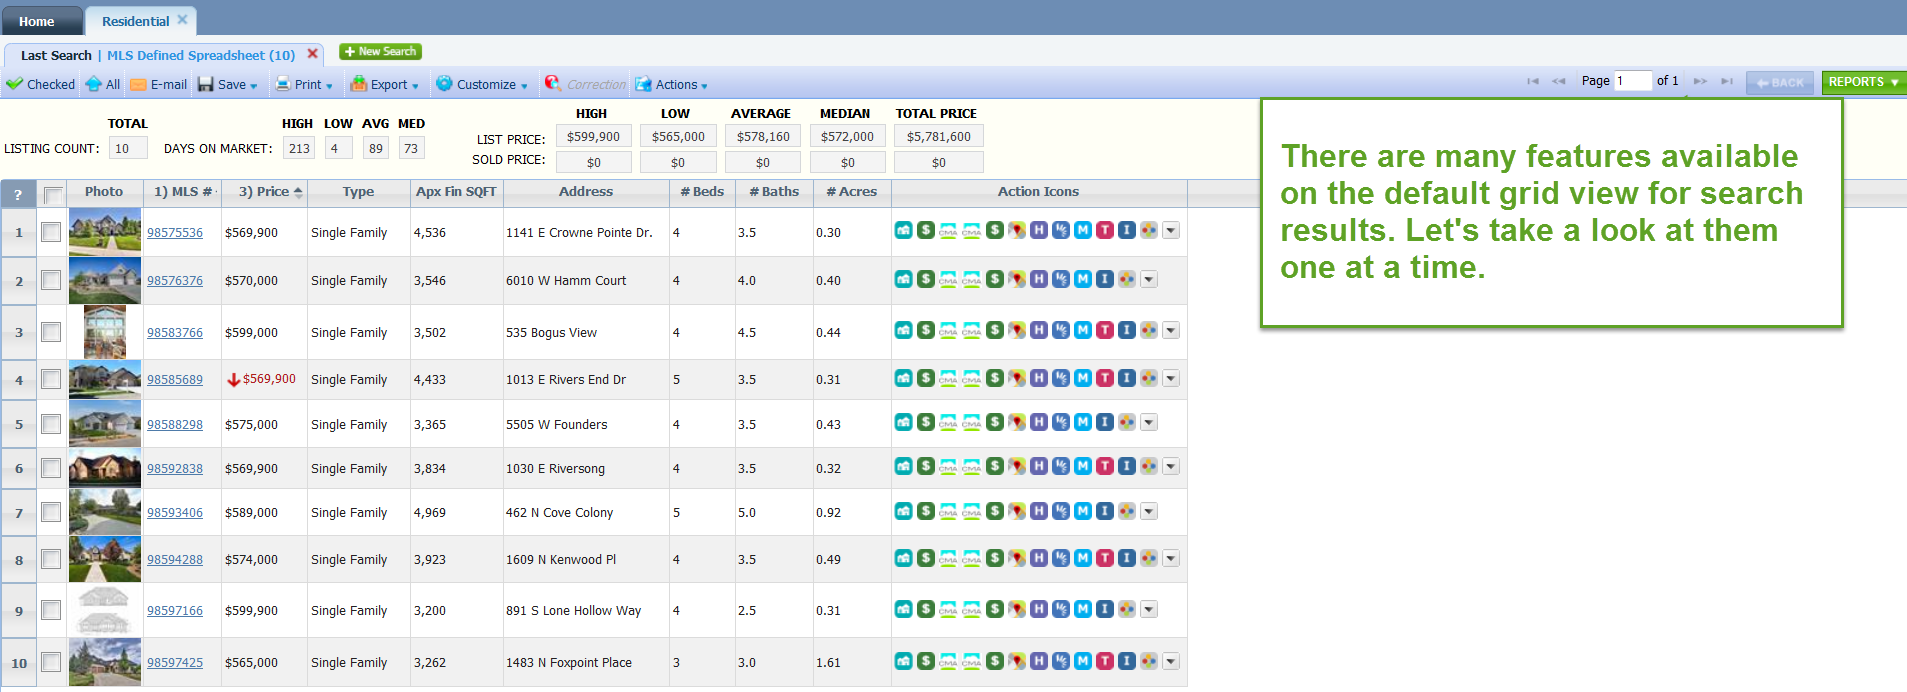
With "Checked", you can select individual listings by clicking on the box. Click on "All" to remove selections.

Click on listing ID number to open a detail report.
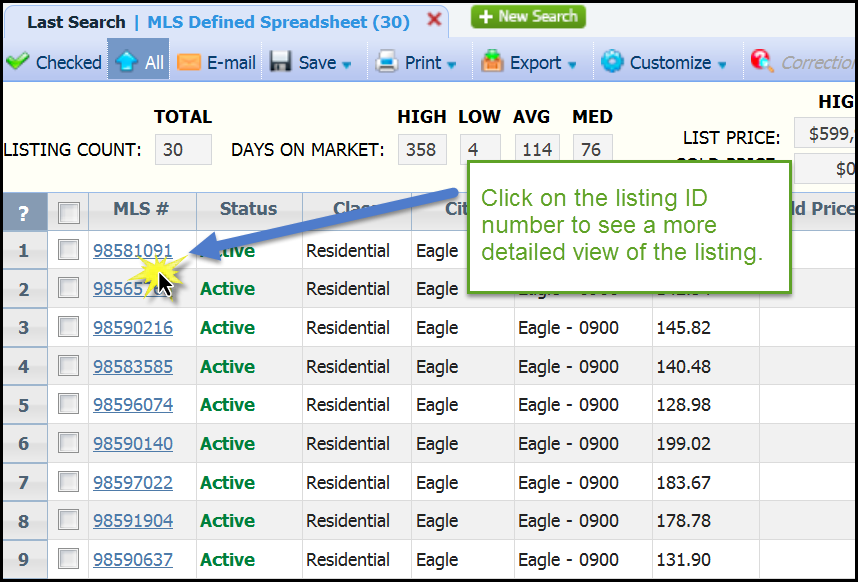
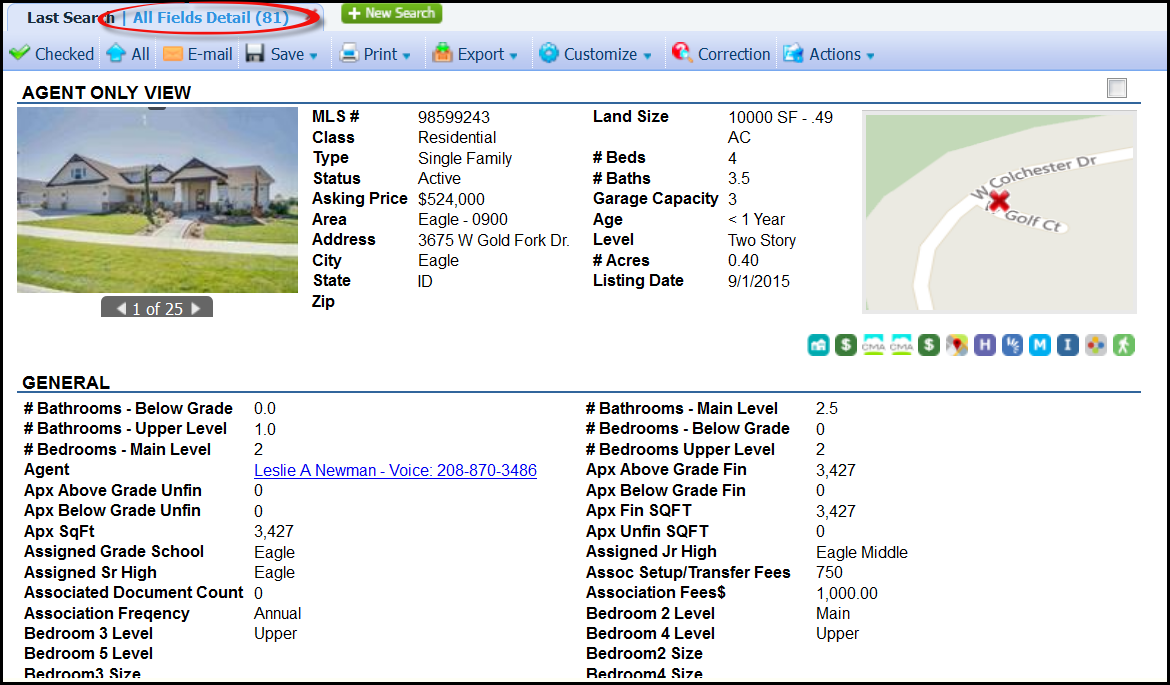
This is what the detail report looks like:

Click on "Back" to return to the grid view.

Click on the columns labels to sort in ascending or descending order.

Easily rearrange columns from side to side by dragging and dropping.

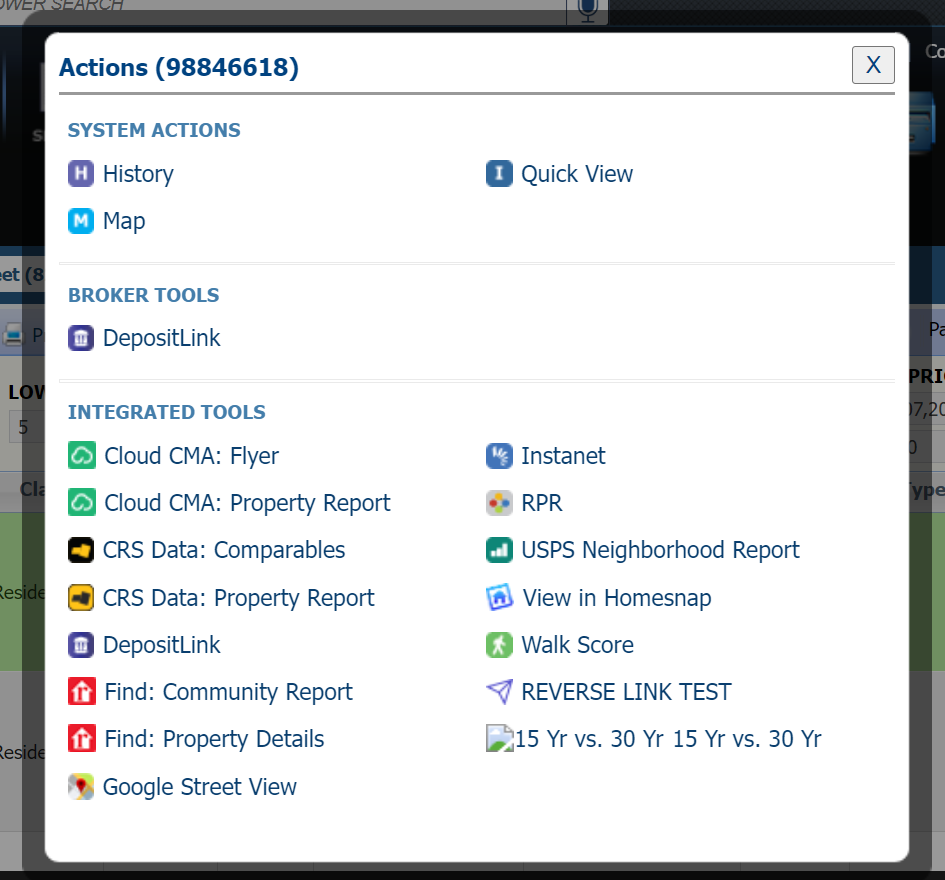
The Action Button on the Results toolbar shows more information about a listing, if available.
After selecting a listing, click on "Actions" in the toolbar.

Then, select the desired Action to see more information about the listing.
**Available Action items will vary.
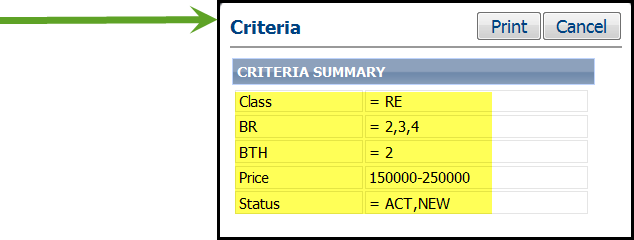
Click on "Criteria" to see the search criteria that was used to produce the current search results.
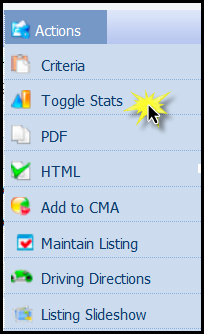
Click on "Toggle Stats" to hide or show the stats at the top of the grid result page.
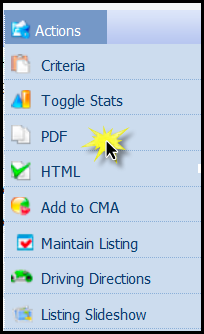
The grid results are in HTML format. Click on "PDF" to convert the grid results to a printable, downloadable PDF format.
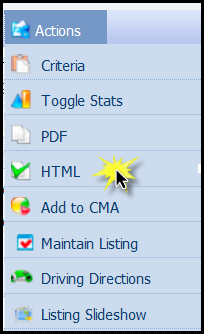
Click on "HTML" to convert to HTML from PDF.
Click on "Add to CMA" to add the selected listings to a new or previously saved CMA.
To learn more about CMA, see the CMA articles.
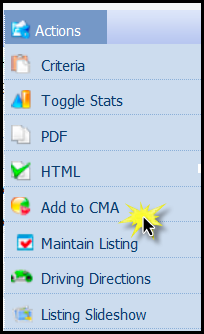
Click on "Maintain Listing" to edit and maintain your listing right from the search results grid.
From here, you can change the price, work with photos and access the listing input function. For more information about editing listings, see the article on Maintaining Listings.
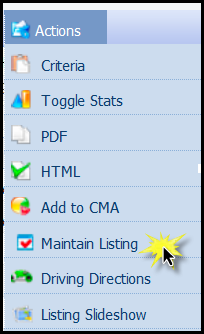
Click on "Driving "Directions" to create driving directions for the selected listings.
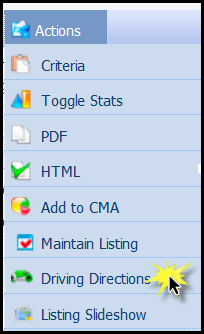
Each board will choose which Action Icons to Activate. Check your Paragon site to learn more.
Once you have selected the listings from the search result grid, click on "Listing Slideshow" to create a slideshow you can save, take, and play anywhere!
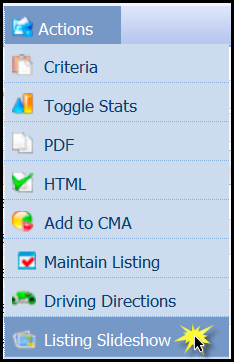
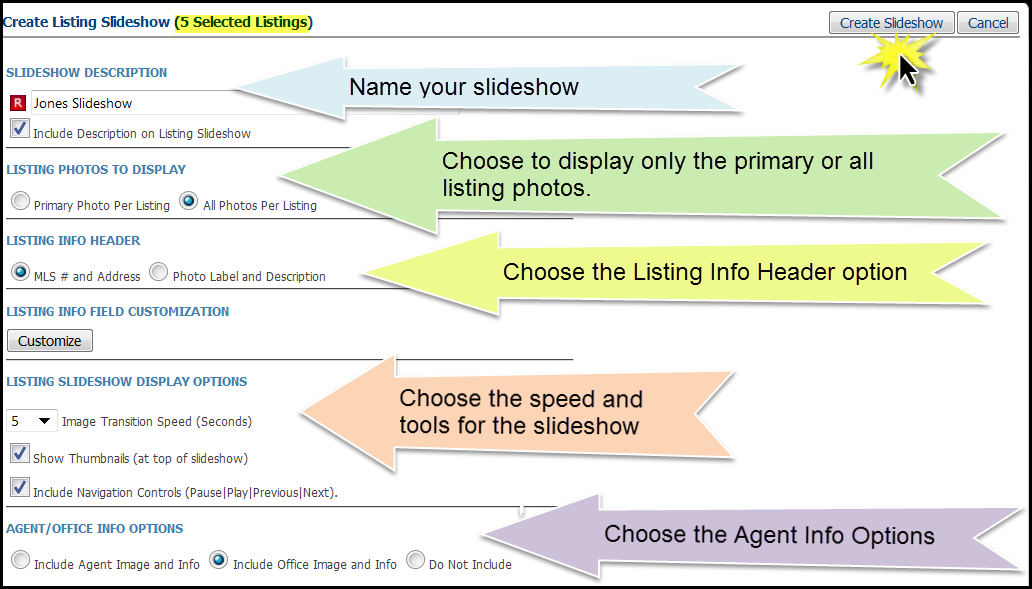
Click on "Customize" to open the modal.
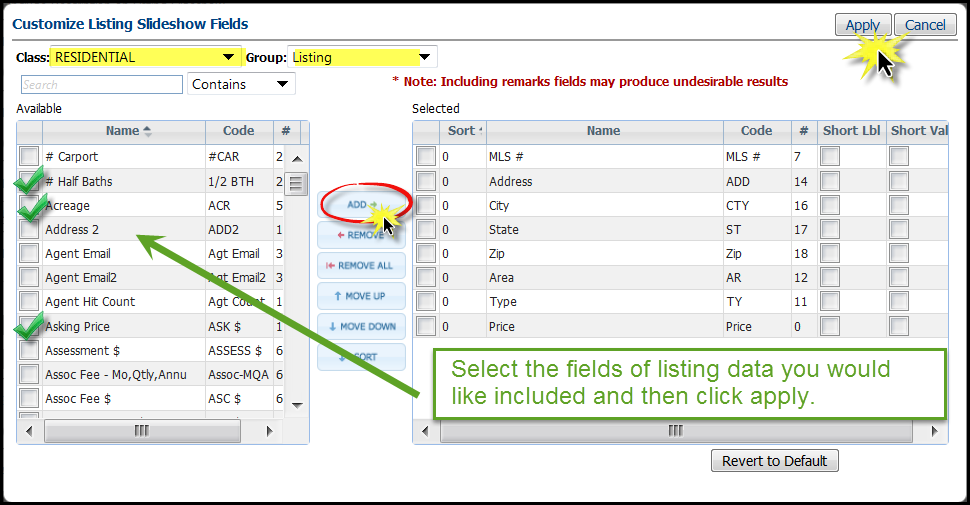
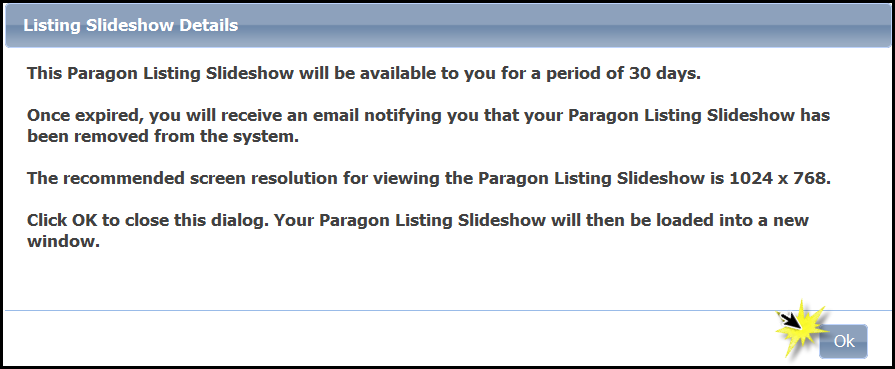
Click "Apply". The following message will appear.
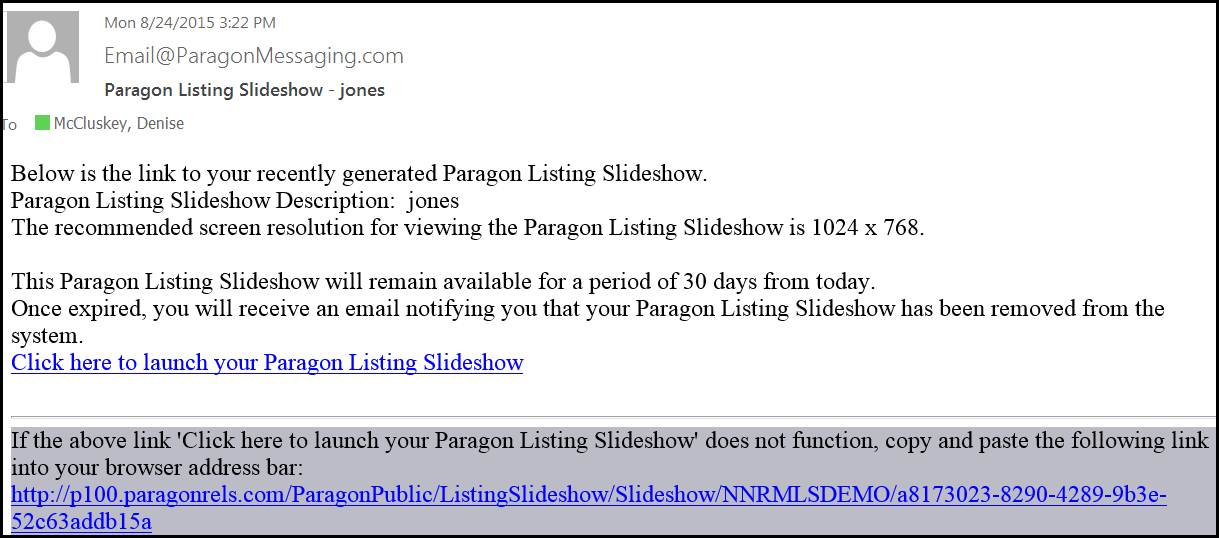
You will also receive this email message. You can save this message and/or copy the link and paste it into a Word Doc and play the slideshow wherever you are on any device!
Have fun thinking of new and inventive ways to use Paragon's Listing Slideshow!
Ever wonder what all those action icons do? We will explore the most commonly used Action Icons in this article.
![]()
Action icons appear in grid search results as well as other detail reports.
![]()
![]()
Click on the H to see a history report for that property.

Click on "M" to see the listing presented on the map.
![]()
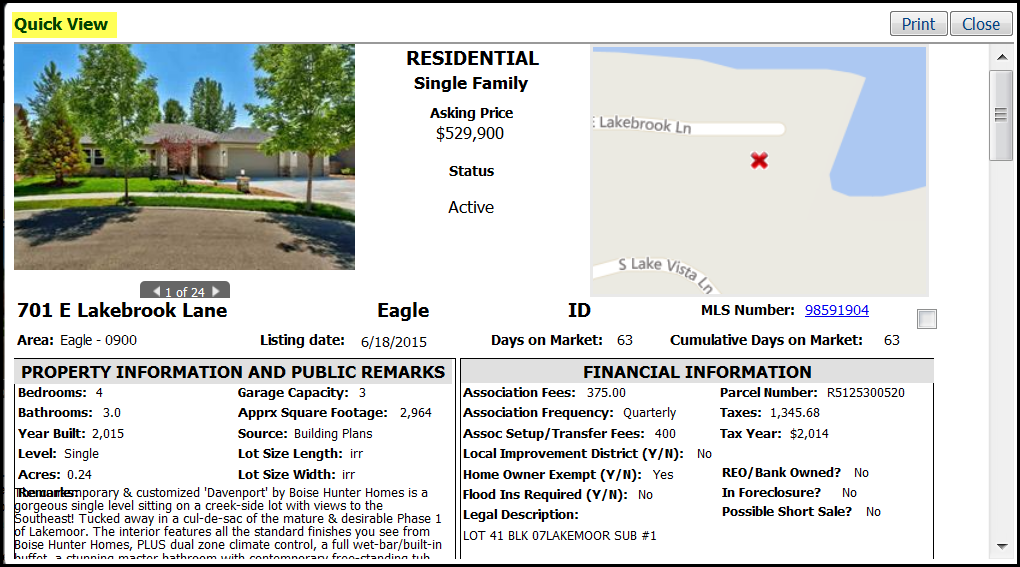
Click on "I" to see a Quick View.
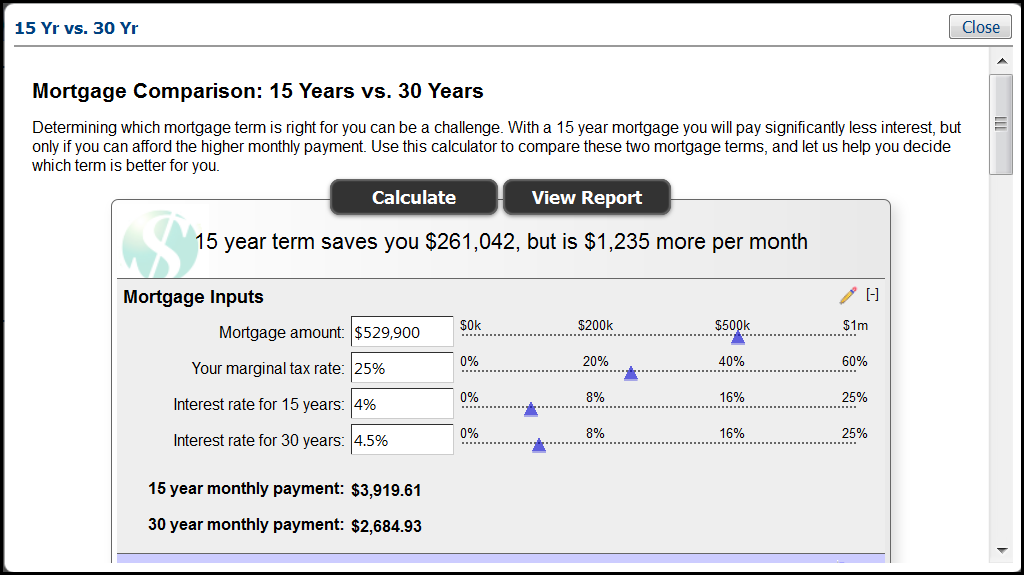
Click on "$" for access to a mortgage calculator for the listing.
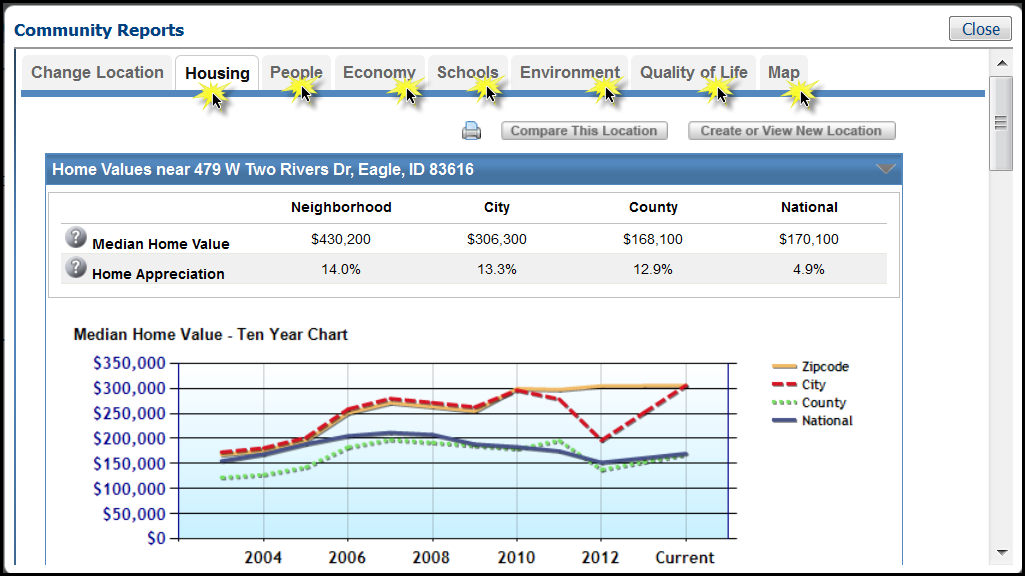
Click on the House to see the Community Reports for this listing.
Use the tabs to see other stats on Housing, People, Economy, Schools, Environment, Quality of Life, and Map.
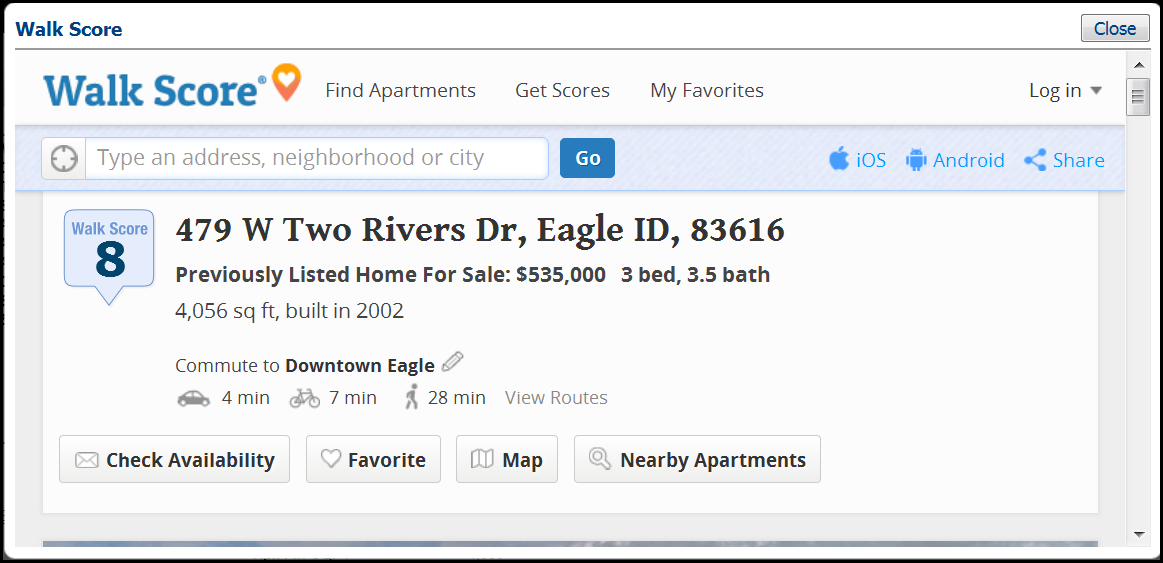
Click on the "Walk" Ic on to see the walk score for the listing.
Each board will choose which Action Icons to activate. Check your Paragon site to learn more.
Now that you have search results, let's take a look at the different "Available Reports" to view them.
From the search grid, you can choose a specific report to view the listing results from the "Available Reports" menu.
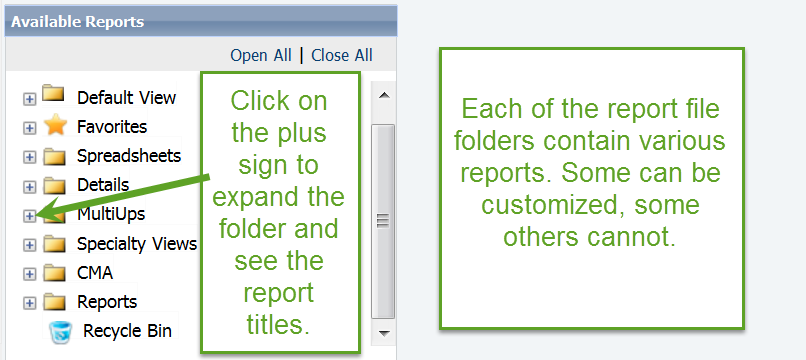
Click on the plus sign to expand the folder and click on the desired report title.
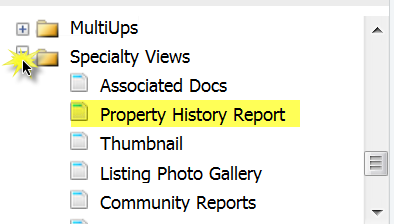
The listings are now displayed in that report view.
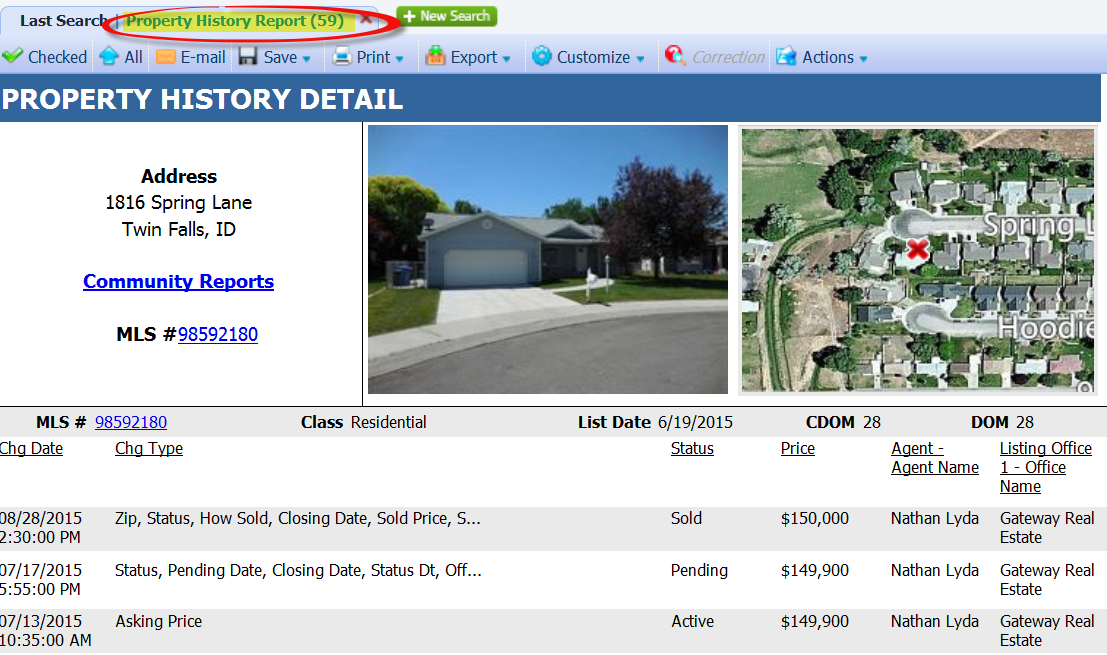
Click on the forward and back arrows to page through the listings.

From the current report, click on the green Reports drop down menu to change the view to any other available report.
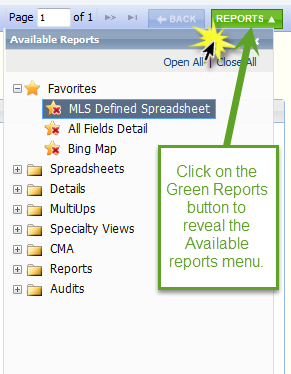
View the listings in any of these other reports views.
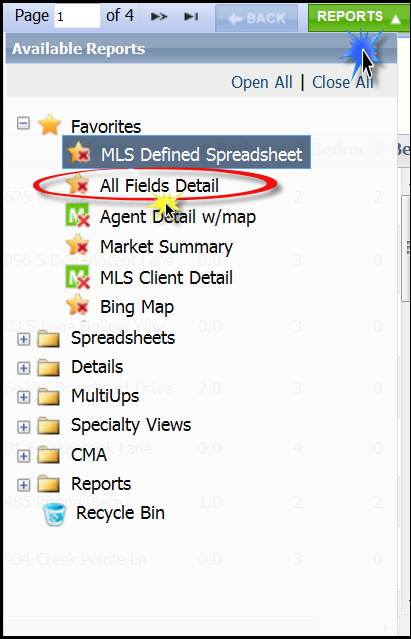
Click on the desired report.
The listings will now appear in that report view.
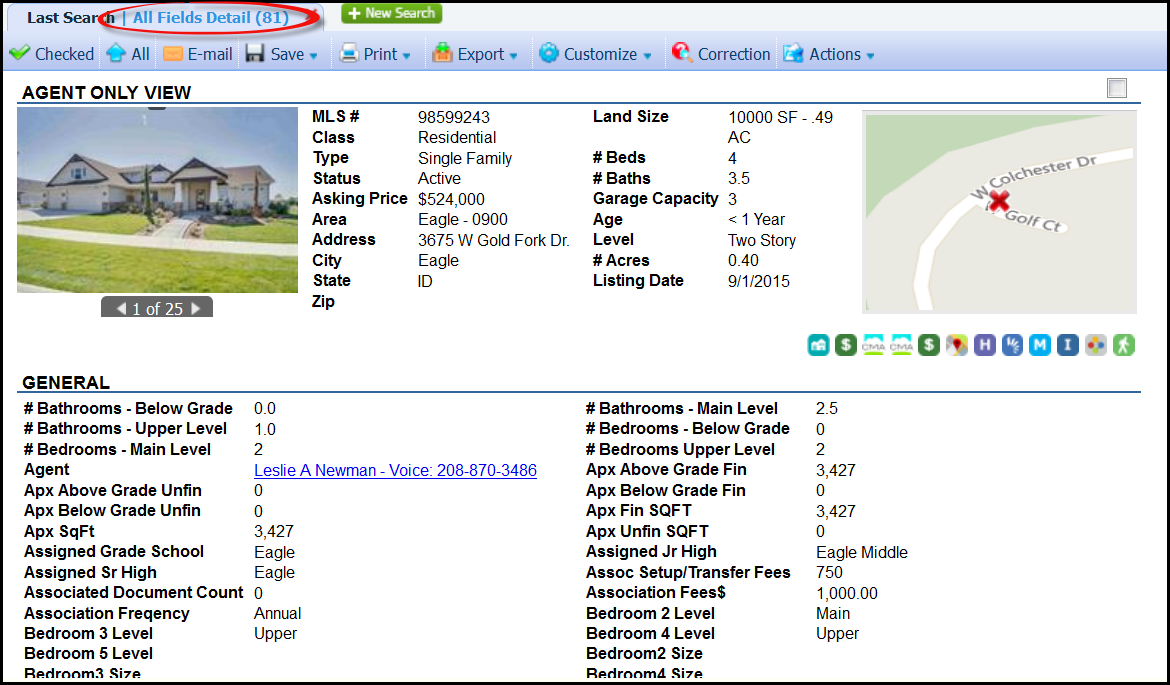
From any of the reports views, you will have access to the tool bar to print, save, email, export, customize, as well as access to the Actions Menu.
Click on "Back" to return to the grid view.

If you do not choose an "Available Report" from the menu prior to clicking on "Search", the listings will display in the default grid view shown below. You can click on the green "Reports" button to access the other "Available Reports".
Continue to explore the "Available Reports" menu and look for other articles on listing results.
Have you created a search for a particular customer? Would you like to use that search to send notifications of the listing to that customer? Then read on!
Beginning on the search you have just finished for your customer, hover over the "Save Search" menu.
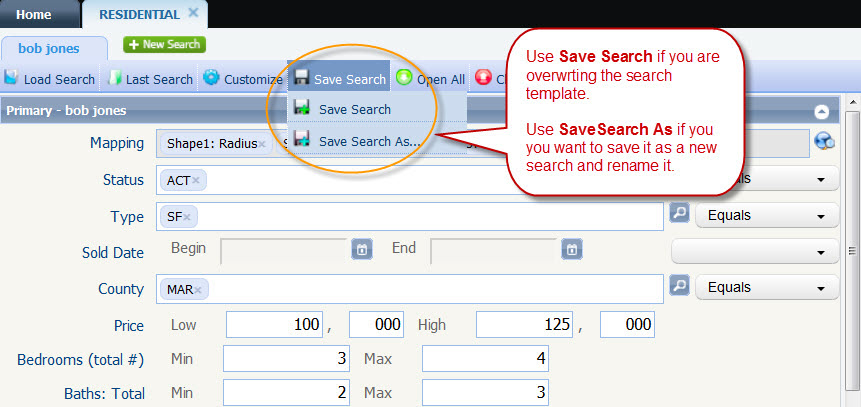
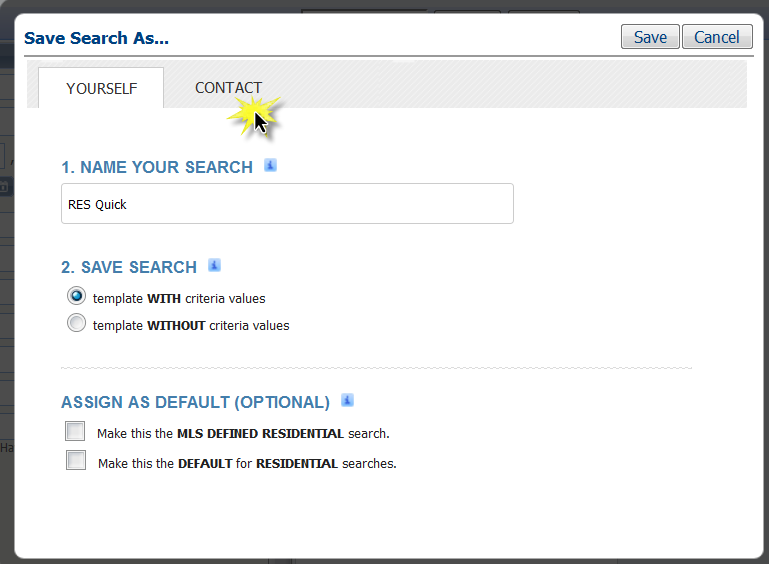
Click on "Save Search As". This opens the Save Search Tool.
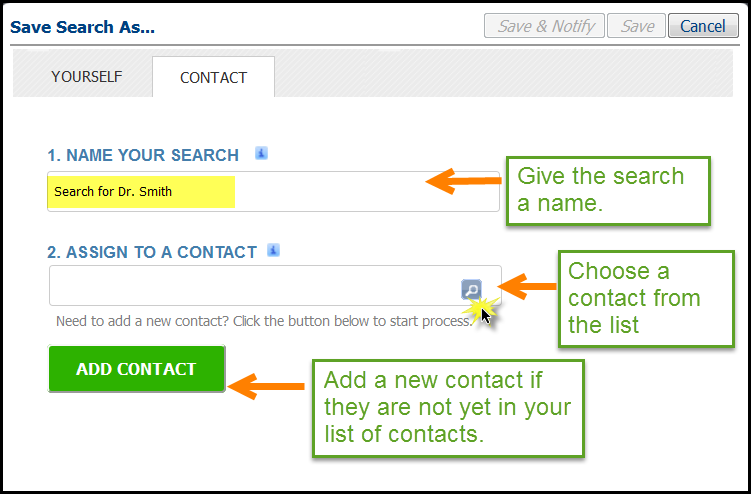
Click on "Contact".
Name your search for your customer.
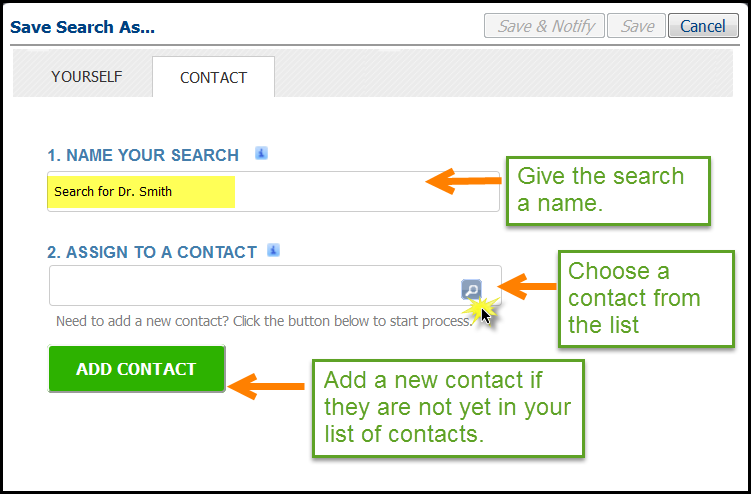
Assign the search to your customer.
Click on the Magnifying Glass in the "Assign to Contact" field.
Select the correct contact from the list.
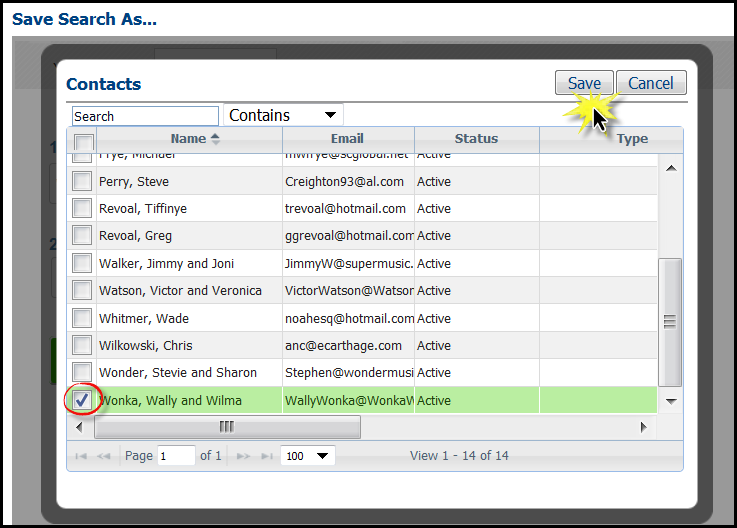
Click "Save".
Click "Add Contact" if the customer has not yet been added to your list of contacts. Enter the First and Last name and email address.
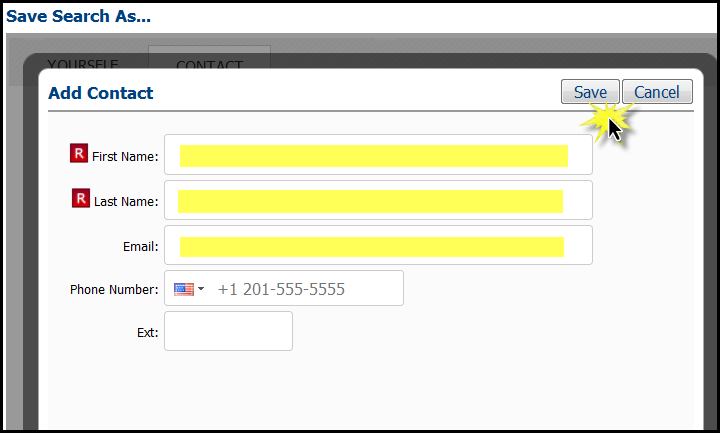
Click "Save".
Click "Save and Notify".
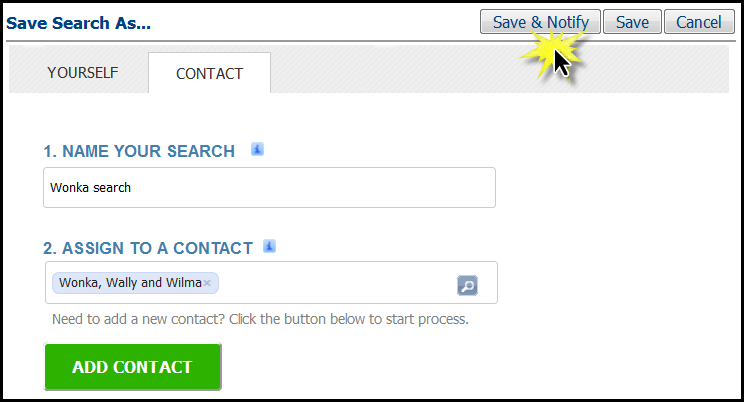
Click on "Save" at the top and you're done!
Ever wonder how to get listing data out of Paragon other than Printing and Emailing? Listing Data Export is the answer. Once the data is out of Paragon, use programs on your computer to calcualte totals, averages, ratios, and more! You can also transform the data into graphs, charts, diagrams, and more!
How to export listing data out of Paragon:
Open a search criteria template and add criteria.
Click on "Search" to display the listing data you want to export.

This will open your default results report, typically a spreadsheet.

In this guide, we will work with spreadsheets. You must use spreadsheets to export listing data out of Paragon.
Click "Customize" and "Fields" to Add, Remove, and locate fields in your spreadsheet.
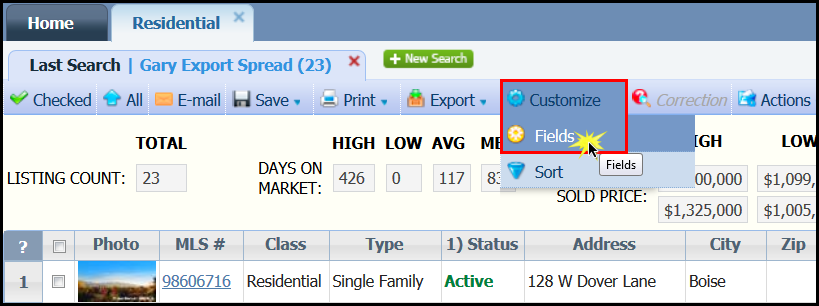
The Customizing Tool opens.
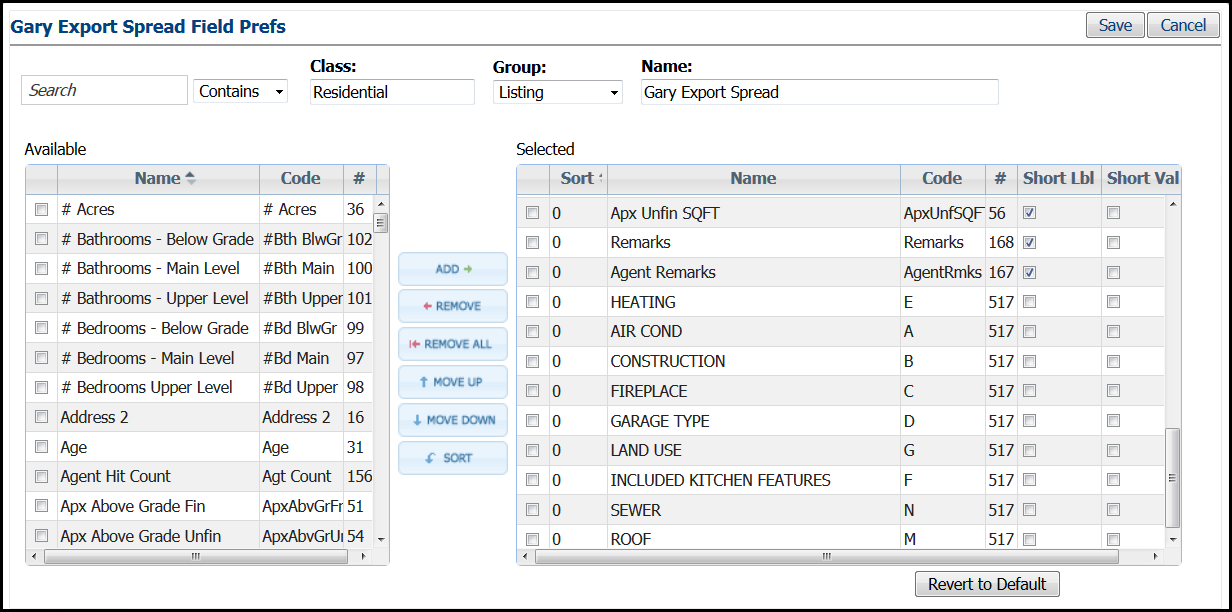
In the spreadsheet you can:
- Add and Remove fields
- Locate the fields
- Choose how listing information will be displayed
- Sort the listings by their data
Each of these customizations are demonstrated in the sections below.
How to Add fields, Remove fields and locate the fields in a spreadsheet
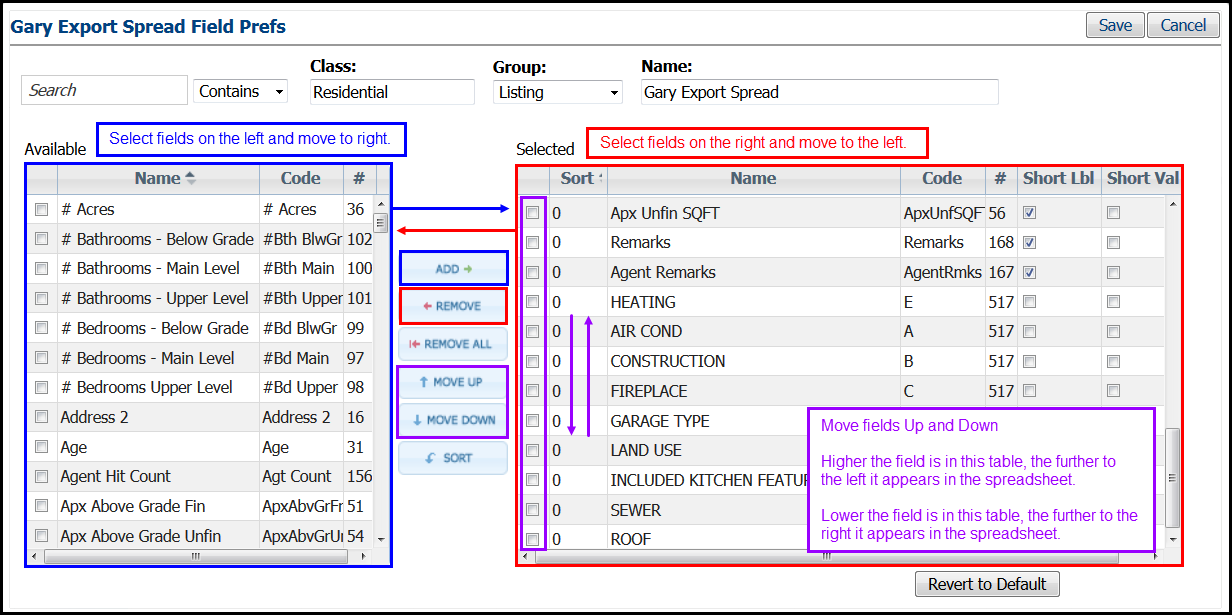
How to choose Short Labels for your listing data in your spreadsheet
Check the box in the "Short Lbl" column to display the short data labels for the selected fields in the spreadsheet.
Example:
- Bedrooms could be Beds
- Full Baths could be F Baths
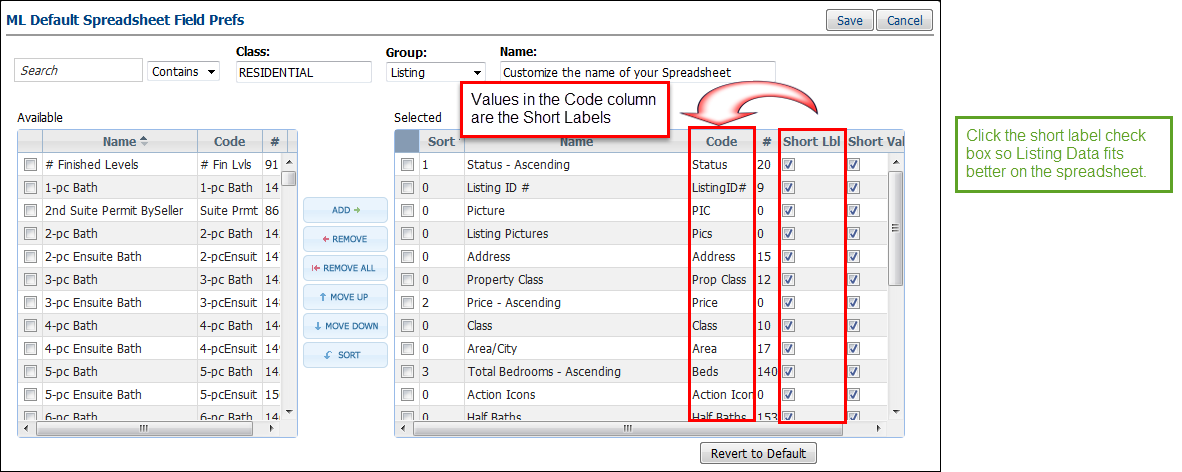
How to choose Short Data Values for your listing data in your spreadsheet
Check the box in the "Short Val" column to display short data values for the selected fields in the spreadsheet.
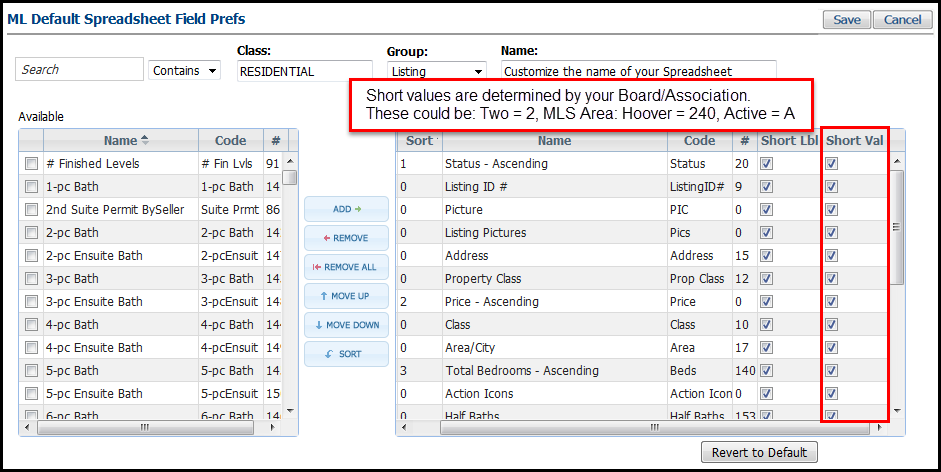
How to sort your listing data in your spreadsheet
Click "Sort" to create a default sorting of your listing results in this spreadsheet.
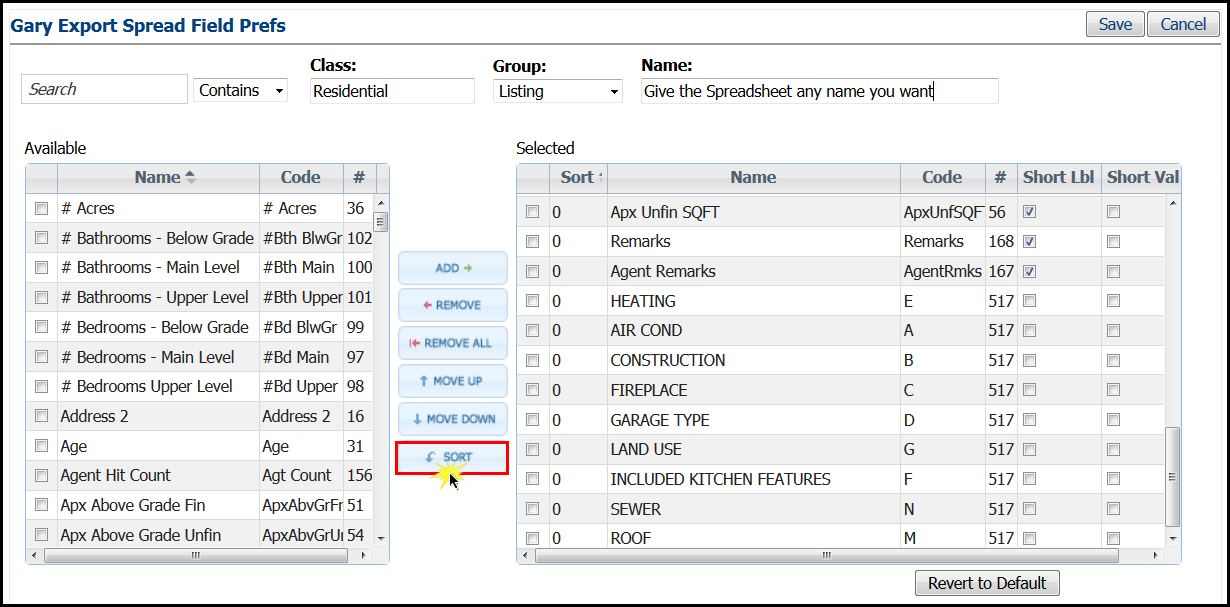
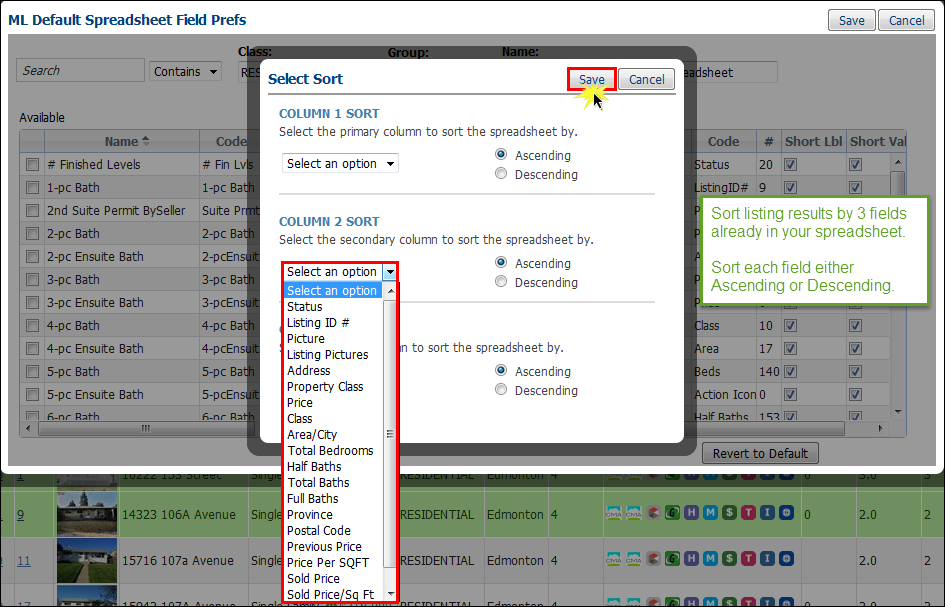
This will open the Sorting Tool.
You can sort by 3 fields already in your spreadsheet. Each field can be sorted in ascending or descending order.
Click "Save" to retain your sorting preferences.
Click "Save" to retain all of your spreadsheet customization.
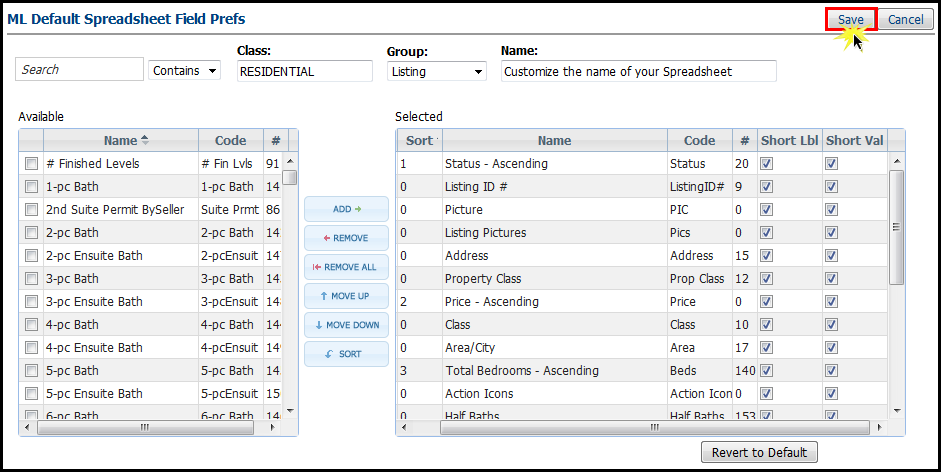
This will return you to the spreadsheet.
Click "Export" and "Export to CSV" to select which spreadsheet's data you will export out of Paragon.
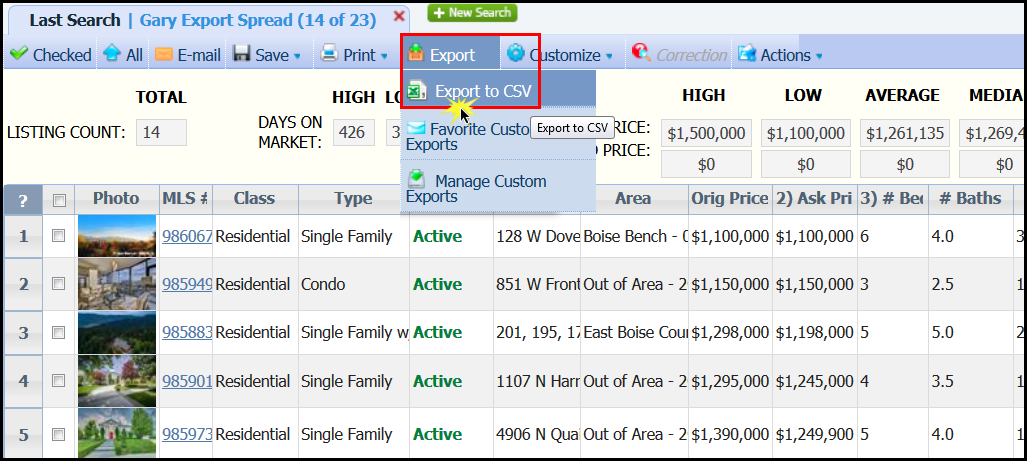
This will open the Export Tool.
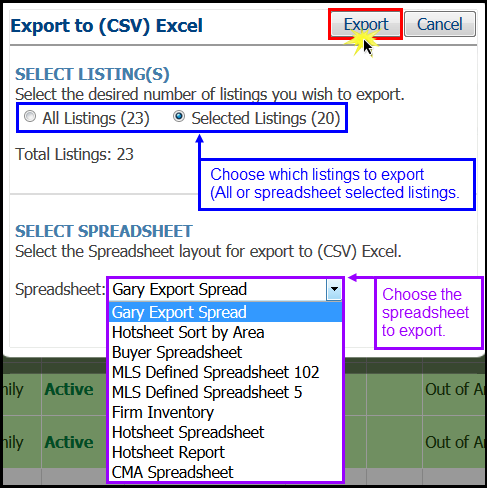
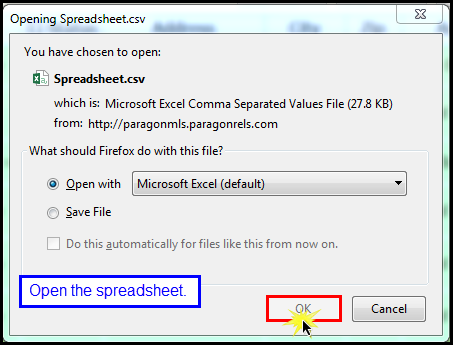
This will open a computer dialogue box.
Your computer wants you to select which spreadsheet program on your computer you want to use to open the spreadsheet.
Click "OK" to open the spreadsheet.
This will open the CSV spreadsheet with your exported listing data.
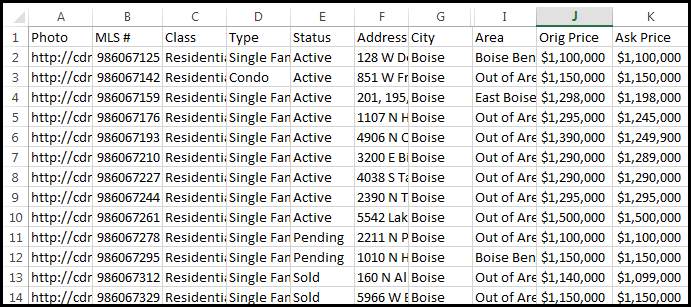
Saving your spreadsheet in a "workbook" format instead of "CSV" will allow you to calculate totals, averages, ratios, etc. You can also transform the data into graphs, charts, diagrams and more!
Spreadsheet Results
Print & Email
Email Listings
Printing Basics
Driving Directions
Listing Cart
MCA Report
Save Search to Contact